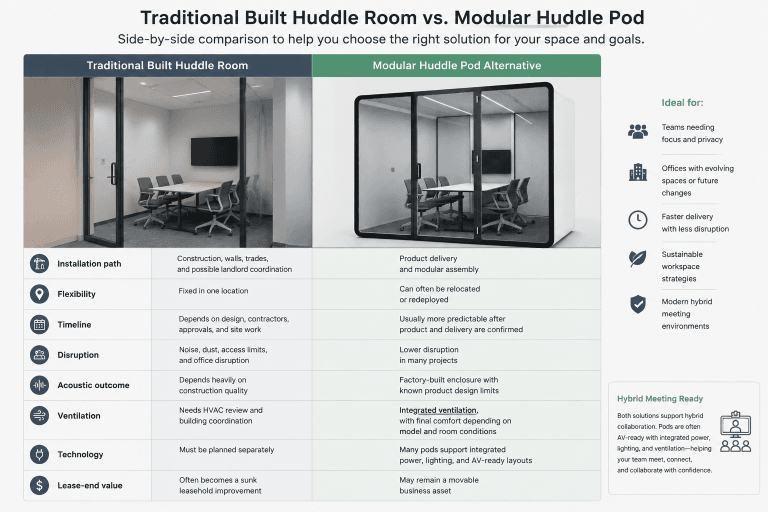
Snel antwoord
Een checklist voor de installatie van een vergaderpod moet het geselecteerde model en de tekening bevestigen, evenals de volledige aanvoerroute, de toestand van de vloer en het plafond, de vrije ruimte bij deuren en looppaden, de verantwoordelijkheid voor stroom- en datavoorzieningen, de verantwoordelijkheid voor het lossen en de montage, en het verslag van de eindinspectie. Voer deze controles uit vóór de productie of levering. Voor een standaard B&H-configuratie moet u rekening houden met twee stopcontacten en montage door de klant met het meegeleverde installatiegereedschap; vraag bij het bestellen om extra stopcontacten of een andere installatieomvang. Een pod die weliswaar in de ruimte past, maar niet bereikbaar is, niet veilig kan worden aangesloten of niet kan worden onderhouden, is niet klaar voor installatie.
Laatst bijgewerkt: 4 augustus 2026 | Auteur: Richard | Geschatte leestijd: 9 minuten
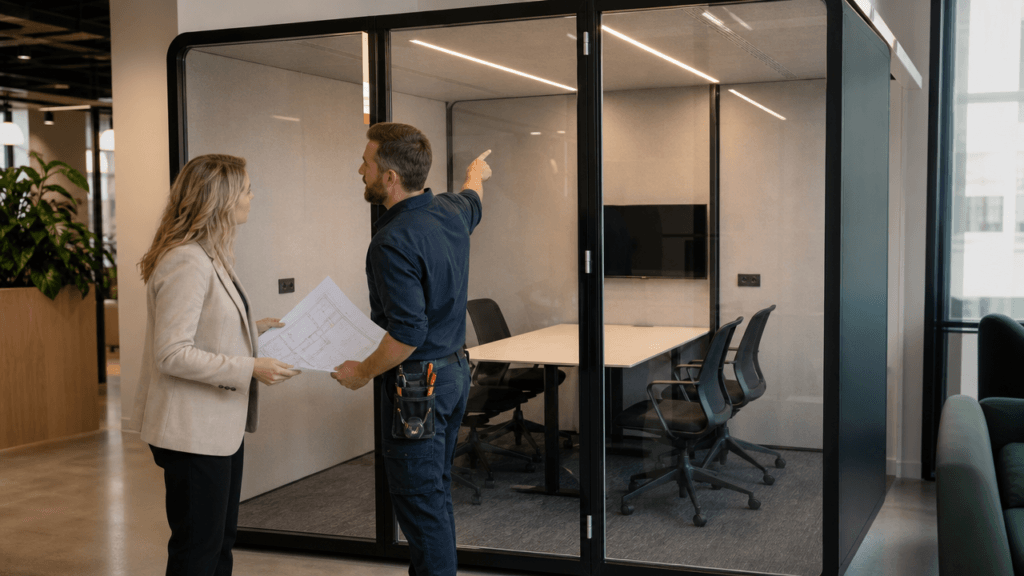
De installatie van een vergaderpod is een kwestie van afstemming tussen de koper, de gebouwbeheerder, het facilitaire team, de IT-afdeling, de elektricien, de installateur en de leverancier. De behuizing vormt slechts een onderdeel van het project. De locatie moet ook geschikt zijn voor de verpakte onderdelen, de definitieve plaatsing, het dagelijks gebruik, de elektrische aansluiting, de netwerkaansluiting en toekomstig onderhoud.
Als je nog steeds de bezettingsgraad en de vloeroppervlakte met elkaar vergelijkt, bekijk dan de Gids voor de grootte en afmetingen van vergaderpods Ten eerste: zodra het model of de configuratie is geselecteerd, kunt u deze handleiding gebruiken om de locatie voor te bereiden en de overdracht van de installatie te regelen.
1. Controleer de gekozen pod voordat u de locatie opmeet
Ga niet uit van een standaard “vierpersoonscel” en ga er niet vanuit dat elk model evenveel ruimte in beslag neemt. Vraag vóór het locatiebezoek om de definitieve configuratietekening of de gedetailleerde offerte. Noteer de punten die van invloed kunnen zijn op het installatieplan:
| Te bevestigen item | Registratie vóór goedkeuring van de locatie |
|---|---|
| Model en capaciteit | Exacte serie, model en beoogd aantal inzittenden |
| Buitenafmetingen | Breedte, diepte, hoogte en eventuele projectspecifieke aanpassingen |
| Deurconfiguratie | Deurzijde, draai- of schuifdeur, vrije doorgang en beslag |
| Meubilair | Tafel, stoelen, scherm, camera of andere vaste onderdelen |
| Vermogenspakket | Type aansluiting, USB-opties, verlichting, ventilator en aansluitmethode |
| Gegevenspakket | RJ45- of andere poorten, kabeldoorvoer en aansluitpunt |
| Ventilatiekanaal | Inlaat, uitlaat, plaats van de bedieningselementen en toegankelijkheid voor onderhoud |
| Verpakte onderdelen | Het grootste gewicht van een krat, paneel, glasstuk en pakket |
| Omvang van de installatie | Montage door de klant, een team van leveranciers of een apart geoffreerde installateur |
De goedgekeurde tekening dient als uitgangspunt voor het terreinonderzoek. Indien de koper achteraf wijzigingen aanbrengt aan de deur, het meubilair, de technische installaties, de afmetingen of de elektrische installatie, moeten de betreffende controles opnieuw worden uitgevoerd.
Ga bij een standaard B&H-configuratie uit van twee stopcontacten, tenzij in de goedgekeurde offerte anders is vermeld. Als het project meer stopcontacten vereist, geef dit dan bij het plaatsen van de bestelling aan bij B&H, zodat de extra stopcontacten in de geoffreerde configuratie kunnen worden opgenomen. Noteer het definitieve aantal stopcontacten vóór de productie.
2. Voer een volledig onderzoek naar de bezorgroute uit
De route begint bij het afleverpunt en eindigt bij de plaats van installatie. Meet de smalste en laagste punten langs de route, inclusief bochten. Een bestemmingsruimte kan groot genoeg zijn, terwijl een goederenlift, een deuropening of een gang ervoor zorgt dat de verpakte onderdelen er niet doorheen kunnen.
Gebruik dit routeverslag:
- [ ] Afmetingen van het laadperron, de stoep of de ontvangstdeur
- [ ] Vrije breedte en hoogte van de ingang van het gebouw
- [ ] Afmetingen van de deur en de cabine van de goederenlift
- [ ] Nominale capaciteit van de lift, inclusief transportmiddelen
- [ ] Kleinste breedte van gang en voorhal
- [ ] De scherpste bocht en het langste onderdeel dat daar moet draaien
- [ ] Lage plafonds, leidingen, verlichting, sprinklers of deursluiters
- [ ] Trappen, hellingbanen, beveiligingshekken en punten met beperkte toegang
- [ ] Voorschriften voor de bescherming van afgewerkte vloeren
- [ ] Laatste deuropening en het pad naar de plaatsingsruimte
Maak op elk controlepunt foto’s met datumvermelding en markeer deze op de plattegrond. Als een afmeting dicht bij de verpakkingsafmetingen ligt, stop dan en vraag de leverancier om de afhandelingsmethode te bevestigen voordat je de levering boekt. Vertrouw niet op de buitenafmetingen van de gemonteerde pod om de route in te schatten.
3. Bepaal de benodigde ruimte voor de installatie en de plaatsingsruimte
De voetafdruk van de pod is niet de volledige ruimte die nodig is voor de installatie en het dagelijks gebruik. De plaatsingsruimte omvat de behuizing, de deurbeweging, de door de fabrikant bevestigde ventilatie- en onderhoudszones, de looproutes voor medewerkers en de projectspecifieke vrije ruimtes.
Markeer de voorgestelde locatie op ware grootte met tape voordat de opdracht wordt vrijgegeven. Voeg het volgende toe aan de plattegrond:
| Controle van de plaatsing | Wat moet er op de plattegrond worden weergegeven? |
|---|---|
| Behuizing van de pod | Uiteindelijke breedte en diepte aan de buitenzijde |
| Hoogte | Plafondhoogte en obstakels boven het hoofd |
| Bediening van de deur | Volledige zwaai of bewegingszone en naderingsruimte |
| Toegang tot de dienst | Panelen, bedieningselementen, stopcontacten en plekken die technici moeten kunnen bereiken |
| Ventilatie | De locaties van de inlaat en uitlaat en de voor het model voorgeschreven vrije ruimte |
| Circulatie | Dagelijkse toegangs- en uitgangswegen, nabijgelegen werkplekken en, indien van toepassing, toegankelijke routes |
| Gebouwtechnische installaties | Sprinklers, alarminstallaties, verlichting, ventilatieroosters, vloerdozen en datakabelaansluitingen |
| Bescherming | Vloer-, wand- en hoekbescherming tijdens verplaatsing en montage |
Er bestaat geen algemeen geldend vrijgavenummer dat de tekening van het gekozen model en de lokale projectbeoordeling vervangt. Het type deur, de gebruikslocaties, de toegankelijkheid, de brandveiligheidsindeling en het omringende meubilair kunnen de vereiste afmetingen beïnvloeden.
4. Controleer de staat van de vloer, het plafond en het gebouw
Voer de bouwinspectie uit voordat de krat wordt geleverd. Leg de vloerafwerking, de helling, de verhoogde vloerconstructie, de vloerovergangen en eventuele plekken met een onzekere draagkracht vast. Een stabiel, waterpas installatieoppervlak zorgt ervoor dat de deur goed uitgelijnd is en de panelen goed aansluiten; bij een merkbare helling of een zachte ondergrond moet het project vóór de levering worden beoordeeld.
Bevestig ook:
- De afgewerkte vloer kan tijdens verplaatsingen binnen het gebouw worden beschermd.
- Een verhoogde vloer of een toegangsluik raakt niet beschadigd door het gebruik van hef- en transportapparatuur.
- De capsule blokkeert geen verplichte uitgang, gangpad, alarminrichting, sprinklerbereik of aansluitpunt voor gebouwvoorzieningen.
- De plafondhoogte en de bovengrondse leidingen en kabels komen overeen met de goedgekeurde opstelling.
- De verhuurder, de gebouwbeheerder, de architect en de bevoegde instantie hebben alle vereisten die op het project van toepassing zijn, doorgenomen.
Voor projecten in de VS moet bij de toegankelijkheidsbeoordeling gebruik worden gemaakt van de ADA-normen voor toegankelijk ontwerp 2010 samen met de geselecteerde tekening van de pod en het terreinplan. Een productlabel of de deurbreedte alleen is geen bewijs dat de geïnstalleerde pod, het traject, het meubilair, de bedieningselementen en de omliggende kantoorruimte aan de voorschriften voldoen. Voor projecten buiten de Verenigde Staten gelden de normen en het beoordelingsproces die voor die locatie van toepassing zijn.
5. Bespreek de stroomvoorziening voor de vergaderpods met de elektricien
In het stroomplan moeten het exacte model en de opties worden beschreven, niet alleen de zin “zorg voor een stopcontact”. Vraag de leverancier om het modelspecifieke elektrische schema en laat de gekwalificeerde elektricien van het project de aansluiting op het gebouw controleren.
Leg deze beslissingen vast:
| Belangrijke vraag | Bevestiging door de verantwoordelijke |
|---|---|
| Welke normen gelden er op de plaats van bestemming voor spanning, frequentie, stekkers en stopcontacten? | Leverancier en elektricien |
| Waar bevindt de aansluiting van het gebouw zich ten opzichte van de uiteindelijke positie van de module? | Voorzieningen en elektricien |
| Wordt de pod via een stekker aangesloten of schrijft de lokale regelgeving een vaste aansluiting voor? | Leverancier en erkend elektricien |
| Wat is het maximale aansluitvermogen voor de geselecteerde configuratie? | Technisch gegevensblad van de leverancier |
| Zijn verlichting, ventilatoren, stopcontacten, USB-poorten of stroomvoorziening voor het beeldscherm inbegrepen? | Goedgekeurde offerte |
| Wordt er gebruikgemaakt van een vloerdoos, een wandcontactdoos, een plafonddoorvoer of een opbouwkabelgoot? | Elektricien en facilitaire dienst |
| Ligt het snoer op een veilige plek en buiten de wandelpaden? | Installateur en faciliteiten |
| Wie zorgt voor vergunningen of inspecties wanneer er door elektrotechnische werkzaamheden wijzigingen aan het gebouw worden aangebracht? | Bouwteam en elektricien |
Pas bij een project geen algemene regel toe zoals “één stroomkring voor drie pods”. De belasting hangt af van het model, de opties, het lokale elektrische ontwerp en de andere apparatuur die op dezelfde stroomkring is aangesloten. De elektricien moet de stroomkring dimensioneren en beveiligen op basis van de goedgekeurde gegevens over de aangesloten belasting.
6. Verantwoordelijkheden op het gebied van gegevens, AV en netwerken toewijzen
Een pod kan zijn uitgerust met een data-doorvoerfunctie of een RJ45-aansluiting, maar een poort in de pod zorgt op zichzelf nog niet voor een netwerkverbinding. De locatie heeft nog steeds een werkende kabel, een aansluiting, switchcapaciteit, netwerkgoedkeuring en iemand die de tests kan uitvoeren nodig.
Leg vóór de installatie het volgende vast:
- Of de pod een bekabelde ethernetverbinding, wifi of beide nodig heeft.
- De locatie van het gegevensafgiftepunt van het gebouw en de route naar de pod.
- De door de IT-afdeling vereiste kabelcategorie, connector en aansluitpunt.
- Wie trekt de kabel door en sluit deze aan?.
- Wie levert het beeldscherm, de camera, de microfoon, de luidsprekers en de conferentiesoftware.
- Hoe kabels worden vastgezet en onderhouden zonder afgewerkte panelen te verwijderen.
- Welke partij de verbinding test en het resultaat vastlegt.
Houd de fysieke specificatie van de pod gescheiden van de netwerk- en conferentiedienst van de klant. B&H Ergonomics kan de vereiste fysieke aansluitingen voor stroom, data, meubilair en technologie beoordelen voor de geoffreerde configuratie; de klant of diens IT-aannemer blijft verantwoordelijk voor de netwerkdienst, tenzij anders vermeld in de offerte.
7. Bevestig de reikwijdte van levering, lossen en plaatsing
Het woord “levering” kan verschillende overdrachtsmomenten beschrijven. Leg de afbakening schriftelijk vast voordat de inkooporder wordt goedgekeurd.
| Stadium | Te beantwoorden vragen |
|---|---|
| Aankomst | Wie maakt de afspraak en controleert de levertijden van het gebouw? |
| Uitladen | Zijn een laadperron, laadklep, palletwagen of andere hulpmiddelen vereist? |
| Ontvangst | Wie tekent voor de zending en fotografeert zichtbare schade? |
| Interne beweging | Wie verplaatst de krat of panelen van het ontvangstpunt naar de installatieruimte? |
| Plaatsing | Waar kunnen componenten worden opgeslagen zonder uitgangen of werkruimten te blokkeren? |
| Montage | Wie pakt de pod uit en monteert deze, en welke teamgrootte is vereist? |
| Aansluiting | Wie voltooit de elektrische aansluitingen en laagspanningsaansluitingen? |
| Afval | Wie verwijdert de verpakking en beschermt afgewerkte oppervlakken? |
| Overdracht | Wie is verantwoordelijk voor de opleverpuntenlijst, de gebruikersinstructie en de servicecontacten? |
DDP of levering tot aan de deur bepaalt niet automatisch het interne transport binnen het gebouw, transport naar hogere verdiepingen, plaatsing in de uiteindelijke ruimte, montage of elektrotechnische werkzaamheden. Bevestig elke service in de offerte voor de exacte bestemming en locatie.
Bij de standaardoverdracht van B&H is montage door de klant de standaard. B&H levert het benodigde installatiegereedschap voor die montage. Een door de leverancier aangestuurd montageteam, intern transport of werkzaamheden door andere vakbedrijven moeten afzonderlijk in de offerte worden vermeld als de klant deze diensten wenst.
8. Gebruik een verantwoordelijkheidsmatrix vóór de installatiedag
Eén aangewezen verantwoordelijke per taak voorkomt de meest voorkomende vertraging bij de installatie: elke partij gaat ervan uit dat een andere partij de locatie heeft voorbereid.
| Taak | Koper / facilitair beheer | Gebouwbeheerder | IT / laagspanning | Elektricien | Leverancier / installateur |
|---|---|---|---|---|---|
| Definitief model en tekening goedkeuren | Lood | Beperkingen van het gebouw controleren | Technologie controleren | Elektrische aansluiting controleren | Documentatie leveren |
| Route en toegang bevestigen | Lood | Leveringsvoorschriften verstrekken | - | - | Verpakte afmetingen bevestigen |
| Vloer en plaatsingsruimte voorbereiden | Lood | Vloer en vluchtwegen controleren | - | - | Installatietoleranties vaststellen |
| Gebouwstroomvoorziening leveren | Coördinaat | Bouwwerkzaamheden goedkeuren | - | Elektrische werkzaamheden leiden | Gegevens over belasting en aansluiting verstrekken |
| Netwerkverbinding leveren | Coördinaat | Kabeltracé goedkeuren | Datawerkzaamheden leiden | - | Gegevens over poorten en doorvoeren verstrekken |
| Zending in ontvangst nemen en verplaatsen | Leidinggevende of aangewezen logistieke partij | Toegangsregels handhaven | - | - | Leveringsgrens vaststellen |
| Pod monteren en waterpas zetten | Coördinaat | Toegang tot de locatie | - | - | Leiden indien opgenomen in de offerte |
| Testen en accepteren | Lood | Bij vereiste aanwezigheid bijwonen | Netwerk en AV testen | Elektrische werkzaamheden testen | Rond de leverancierscontroles af |
Vervang de rolbenamingen in het projectbestand door bedrijfsnamen en contactpersonen. De matrix is alleen nuttig als iemand elk onderdeel vóór de leveringsafspraak kan beantwoorden.
9. Controlelijst vóór installatie voor de RFQ of inkooporder
Kopieer deze lijst naar het document voor offertebeoordeling of de projectkick-off:
- [ ] Exact model, bezetting, afwerking, meubilair en technologiepakket goedgekeurd
- [ ] Definitieve buitenafmetingen en verpakte afmetingen ontvangen
- [ ] Deurzijde, draairichting, vrije doorgang en toegang voor onderhoud op de tekening aangegeven
- [ ] Aanvoerroute gemeten vanaf het ontvangstpunt tot de uiteindelijke locatie
- [ ] Afmetingen en toegestane capaciteit van de lift gecontroleerd
- [ ] Vloertype, niveau, overgangen en beschermingsplan vastgelegd
- [ ] Plafondhoogte en aanwezige technische installaties boven het plafond gecontroleerd
- [ ] Oppervlak van de pod, deurzone, ventilatiezone, servicezone en circulatieruimte op de vloer uitgezet
- [ ] Gebouwbeheerder en reviewers voor projectcodes geïdentificeerd
- [ ] Spanning, stekker, stopcontact, aansluitvermogen en verantwoordelijkheid voor de elektrische installatie bevestigd
- [ ] Datapad, terminatie, IT-verantwoordelijkheid en netwerktest overeengekomen
- [ ] Omvang van het lossen, intern verplaatsen, tijdelijk opslaan, monteren, verpakken en afvoeren van afval schriftelijk vastgelegd
- [ ] Installatiedatum afgestemd op de toegangs- en werktijdenregels van het gebouw
- [ ] Proces voor het melden van schade en het bijhouden van restpunten overeengekomen
Geef een maatwerkorder niet vrij zolang een van deze punten nog op een aanname berust. Leg in plaats daarvan een openstaand punt vast met een verantwoordelijke en uiterste datum.
10. Volgorde op de installatiedag en definitieve oplevering
Gebruik een korte, gedocumenteerde opleveringsoverdracht in plaats van de montage als het einde van het project te beschouwen.
- Inspecteer de zending vóór het uitpakken en fotografeer zichtbare schade.
- Controleer of de krat of onderdelen overeenkomen met het goedgekeurde model en de goedgekeurde configuratie.
- Bescherm vloeren, wanden, hoeken en meubilair in de buurt.
- Verplaats onderdelen via de gecontroleerde route met geschikte hulpmiddelen voor intern transport.
- Monteer en stel de pod waterpas volgens de modelspecifieke instructies.
- Laat de elektrische en dataverbindingen uitvoeren door de aangewezen verantwoordelijke vakmensen.
- Test de verlichting, ventilatoren, bedieningselementen, stopcontacten en data- of AV-aansluitingen die in de offerte zijn opgenomen.
- Verwijder de verpakking, maak de verkeersroute vrij en inspecteer de definitieve plaatsing.
- Leg gebreken, ontbrekende onderdelen, aansluitresultaten en verantwoordelijken voor corrigerende maatregelen vast op de restpuntenlijst.
- Verkrijg de acceptatie van de koper en bewaar de definitieve tekening, handleiding, garantie-informatie en servicecontacten.
Montagedetail: bescherm gelakte metalen randen
Gebruik bij het aanbrengen van een metalen rand geen harde slagen met een standaardhamer. Gebruik de door B&H meegeleverde rubberen hamer om de rand voorzichtig in de beoogde positie te tikken en zet deze vervolgens vast met de schroeven. Hard hameren kan het gelakte oppervlak doen afbrokkelen of losmaken.
| Acceptatiepunt | Voorwaarde voor goedkeuring |
|---|---|
| Positie | Pod staat op de goedgekeurde locatie zonder de route of gebouwinstallaties te blokkeren |
| Stabiliteit | De pod staat waterpas en wiebelt niet bij normaal betreden en gebruik |
| Deur | De deur functioneert, vergrendelt en blijft vrij van nabijstaand meubilair zoals op de tekening weergegeven |
| Panelen en afwerkingen | Panelen zijn goed geplaatst, het bevestigingsmateriaal is compleet en zichtbare schade is vastgelegd |
| Ventilatie | Ventilatoren en bedieningspanelen werken volgens de geselecteerde configuratie |
| Elektrisch | Inbegrepen verlichting, stopcontacten, USB-poorten en bedieningspanelen functioneren veilig |
| Data en AV | De overeengekomen aansluitings- en apparatuutest is geslaagd, of er is een verantwoordelijke aangewezen |
| Overdracht | Handleidingen, tekeningen, openstaande punten en servicecontacten zijn opgeslagen |
Veelvoorkomende installatiefouten en hoe u ze voorkomt
De ruimte is geschikt, maar de aanvoerroute niet
Meet de verpakte onderdelen, liftcapaciteit, bochten en obstakels boven het hoofd voordat de bestelling wordt vrijgegeven. Vraag de leverancier om elke krappe maatvoering te beoordelen.
Het stopcontact is dichtbij, maar de kabel kruist een looproute
Geef het definitieve aansluitpunt en kabeltraject op de plattegrond aan. Gebruik de door de elektricien goedgekeurde route in plaats van op de installatiedag te improviseren.
De pod is geïnstalleerd, maar IT kan deze niet aansluiten
Leg de locatie van het data-aansluitpunt, de verantwoordelijkheid voor de afmontage, de netwerktest en het eigenaarschap van AV vast in de overdrachtsmatrix.
De deur of het servicepaneel kan niet worden geopend nadat het meubilair is geplaatst
Markeer de volledige zones voor deuren en service in de afgeplakte vloertest. Neem bezette bureaus, stoelen, opbergdeuren en toegang voor schoonmaak mee.
De offerte vermeldt “installatie inbegrepen”, maar het team op locatie verwacht een andere scope
Maak in de offerte onderscheid tussen lossen, intern transport, montage, nivellering, elektrische werkzaamheden, datawerkzaamheden, verwijdering van verpakkingsmateriaal en eindacceptatie.
Wat u B&H Ergonomics moet sturen voor een offerte voor een installatielocatie die gereed is
Stuur het exacte afleveradres, de plattegrond of plaatsingsafmetingen, foto's van de aanvoerroute, liftgegevens, vloercondities, de gewenste deuropening, het vereiste aantal stopcontacten, stroom- en datavereisten, geselecteerde opties, aantal en de gewenste installatiescope. Als twee standaardstopcontacten niet voldoende zijn, vraag dan bij bestelling om extra stopcontacten. B&H Ergonomics kan vervolgens de B&H-modellen van meeting pods aan de hand van het daadwerkelijke project beoordelen, in plaats van uitsluitend op basis van de bezetting een offerte uit te brengen.
FAQ
Wat zijn de belangrijkste vereisten voor de installatie van vergaderpods?
De belangrijkste vereisten zijn een goedgekeurde modeltekening, een gecontroleerde aanvoerroute, geschikte vloer- en plafondomstandigheden, een duidelijke plaatsingsruimte, modelspecifieke elektrische gegevens, een gepland datapad indien nodig, en duidelijk omschreven verantwoordelijkheden voor het lossen, de montage, de aansluitingen en de oplevering. Lokale beoordelingen op het gebied van bouwvoorschriften, toegankelijkheid, brandveiligheid en elektriciteit kunnen projectspecifieke vereisten met zich meebrengen.
Hoeveel stopcontacten heeft een vergaderpod doorgaans, en is daarvoor een aparte stroomkring nodig?
De standaard B&H-configuratie heeft doorgaans twee stopcontacten. Als het project er meer nodig heeft, vraag deze dan aan bij het plaatsen van de bestelling, zodat ze in de offerteconfiguratie kunnen worden opgenomen. Een apart stroomcircuit is geen vaste regel: het juiste circuit hangt af van de gekozen pod, de verlichting, ventilatie, stopcontacten, het display of andere opties, het lokale elektrische ontwerp en de apparatuur die al op het circuit is aangesloten. Gebruik de goedgekeurde informatie over de aangesloten belasting en laat een gekwalificeerde elektricien de aansluiting op het gebouw ontwerpen.
Kan een vergadercabine op een verhoogde vloer of op tapijt worden geïnstalleerd?
Dit is mogelijk als de vloer stabiel en waterpas is en geschikt is voor de geïnstalleerde en te verwerken belastingen, maar de locatie moet vóór de levering worden gecontroleerd. Verhoogde vloeren, dik tapijt, overgangen en hellingen kunnen van invloed zijn op de stabiliteit, de uitlijning van deuren, de vloerbescherming en het interne verplaatsingsplan.
Wie is verantwoordelijk voor de installatie van de pods?
De verantwoordelijkheid hangt af van de offerte. Montage door de klant is de standaardoplevering volgens B&H, en B&H levert het benodigde installatiegereedschap. De koper of het facilitaire team regelt doorgaans de toegang tot de locatie en het gebouw; de elektricien verzorgt de elektrische werkzaamheden in het gebouw; de IT-afdeling of een aannemer voor laagspanningsinstallaties zorgt voor de netwerkbekabeling; en een leverancier of aangewezen installateur verzorgt de montage alleen wanneer die dienst is inbegrepen. Leg elke overdracht vóór de levering schriftelijk vast.
Wat moet ik doen als de pod wel in de kamer past, maar niet in de lift?
Zet het leveringsplan stop en stuur de leverancier de afmetingen van de verpakking, de afmetingen van de lift, foto’s en het nominale laadvermogen. Het project vereist mogelijk een andere configuratie, een aangepast verpakkingsplan, een andere route of apart geoffreerde ondersteuning bij de goederenafhandeling. Ga er niet vanuit dat de afmetingen van het gemonteerde apparaat overeenkomen met het leveringstraject.